

How To Remove Red Vertical Line In Word
In that location are at least five six ways to add a vertical line in Discussion. Vertical lines can help accentuate a piece of text in Word, but knowing how to add them is not as intuitive as calculation a horizontal line.
- Adding a edge
- Or a Page Border
- Using the shape tool
- Adding a bar tab
- Calculation lines to columns
- Add lines either side of text
These are most common options available. With all the features in Word there are other more complicated choices. We thought of iv more vertical formatting tricks in Word
Calculation a Border
Add together a vertical line adjacent to a paragraph is to simply add together a side border to the paragraph.
Highlight the paragraph you lot wish to add a line to, become to Home | Paragraph, and click the Borders dropdown.
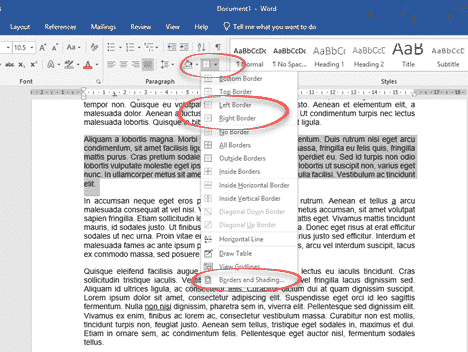
This gives you options to insert borders in diverse locations. To insert a vertical line to the left or right of the text, select Left Border or Correct Border.
The Left or Right border options insert a plain black line adjacent to the text. If you want to have more command over the color or style of your line, instead select Borders and Shading at the bottom of the listing.
Custom Borders
Click Custom on the left-manus side of the dialog box, to enable you to cull private borders to add. In the middle section, you can select the style, colour and width of the line. On the correct-paw side, click the box to indicate where you desire the edge to appear (elevation, lesser, left or right). The preview volition give yous an indication of how your line will announced.
Note that the boxes for the border positions are toggle keys, so if a border that you don't want is appearing in the preview, only click the appropriate box to remove information technology.
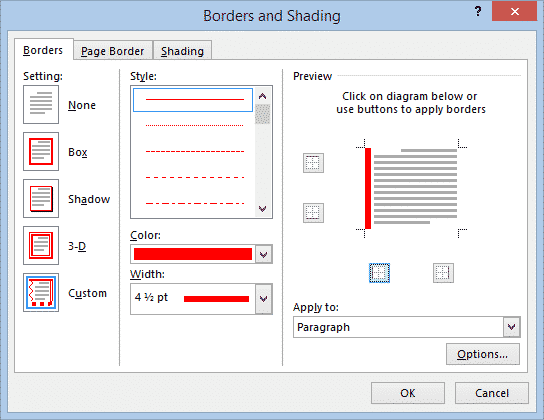
A line inserted by this method is anchored to the paragraph(s) it is applied to and will move if you motion a paragraph.
Add a Page Border
The same matter can be done at the page level.
Design | Folio Groundwork } Folio Borders | Page Border.
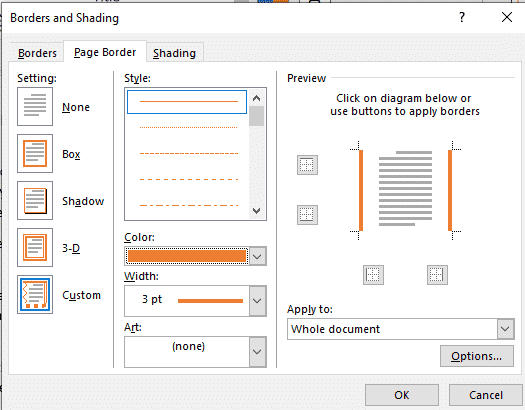
Like a paragraph border, select the fashion of edge y'all want then click the Preview sides. Remove the pinnacle and lesser borders, leaving left or right depending on your needs.
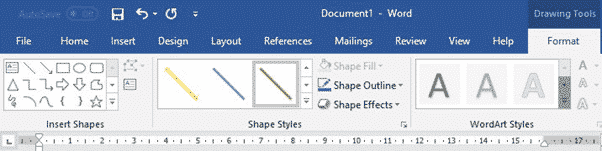
To add a vertical line using the shape tool, go to Insert | Shapes and select the Line tool.
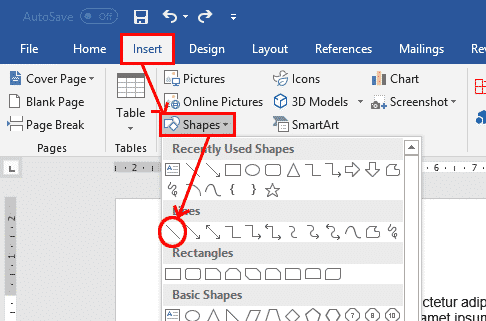
Place the cursor where you want the line to start, and elevate to where y'all want the other end of the line to be. Holding the Shift key while you drag volition ensure that the line is straight.
Once you have finished creating the line, the Format tab becomes live on the ribbon, where you can change the color, shape and style of the line.
Click the Layout button adjacent to the line to encounter options regarding how you want the line to collaborate with your text.
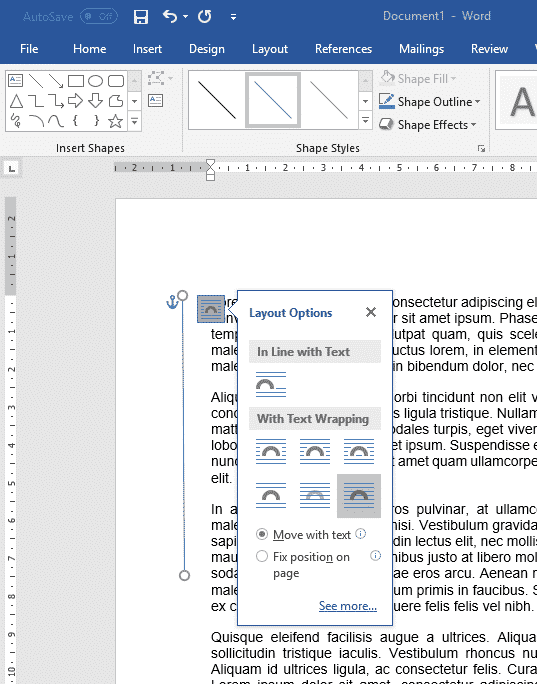
To motion or resize the line, grab 1 of the end points and move information technology. If you hold the Control fundamental while you move, both ends of the line will movement as if around a fulcrum.
Adding a Bar Tab
Another fashion to add together a vertical line to text is to employ the Tab feature, just instead of inserting a tab, yous will add a 'bar' or vertical line. Bar tabs are the bottom known Tab formatting option which separate tabbed items with a visible bar like this:

The shape tool tin can be used to add a line in any location and of any length, a bar tab can only exist practical to whole paragraphs.
Make the ruler is visible at the top of your certificate, to help yous find the correct position for the bar tab. If you cannot come across the ruler, go to View | Evidence, and tick the Ruler box.
To insert a bar tab, select the paragraphs that you want the bar to appear beside, go to Habitation | Paragraph and open the Paragraph dialog box. Then click the Tabs button at the bottom of the dialog box.
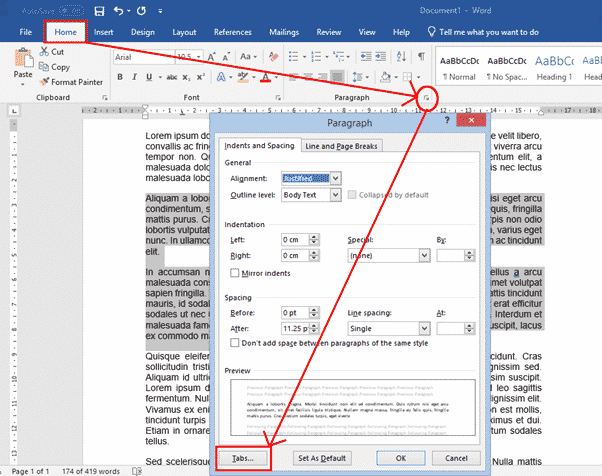
Tab Finish Positions
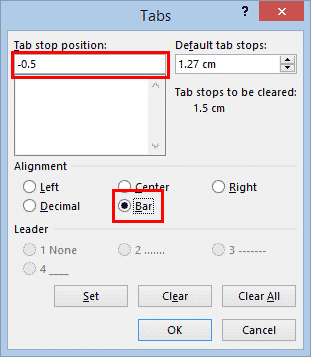
In the Tab Terminate Position box, enter the position where you want the line to announced. Y'all can use the ruler at the height of the screen to work out what value to enter. In the example pictured, the text starts at 0 on the ruler, so if you desire the line to announced to the left of the existing text, y'all may enter "-0.5". If you want it to appear to the right of the text, you may enter "17".
Then select Bar under Alignment and click OK.
With the values entered in the above figure, the text would and then look like this:
Note that a line inserted by this method is anchored to the paragraph(s) it is applied to. If y'all motility a paragraph around, the line volition go with the paragraph to its new location.
If you lot wish to after delete the line, highlight the paragraph, open the tab dialog again and click Clear.
Adding Lines to Columns
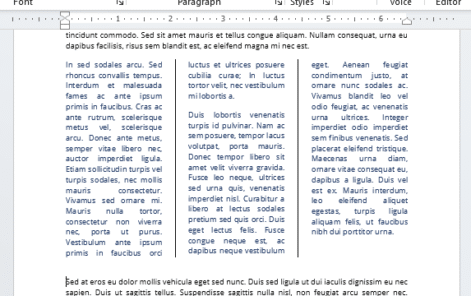
If you are arranging your text into columns, you can insert a vertical line between the columns.
To conform your text into columns, select the text, go to Layout | Columns and select the number of columns you want.
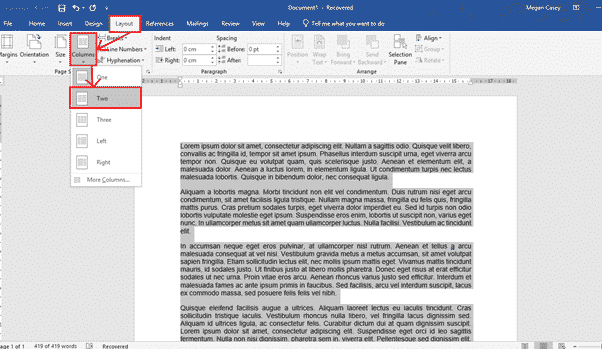
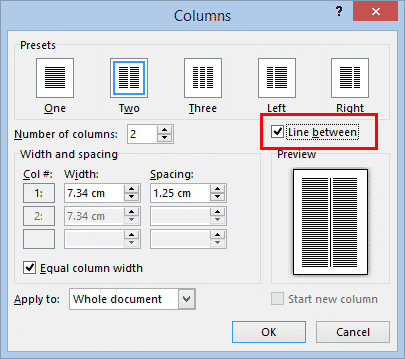
Now that your text is arranged into columns, click anywhere inside the columns, and go to Layout | Columns again, but this time select More than Columns at the bottom of the list. In the dialog box, simply tick the Line Between box, and click OK.
Vertical lines either side of text
One manner to put vertical lines on both sides of text is to add together empty columns either side using Layout | Breaks | Column Break. Three column breaks will practice the task, two to make empty columns plus ane at the bottom of the middle text column.
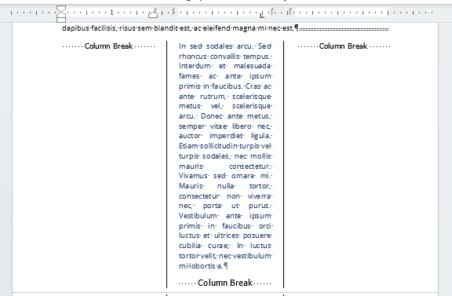
Note that if you wish to add a line to the left or right of the columns, this can be done using any of the other methods described above.
See Colour the Cavalcade dividing line in Word
Four more vertical formatting tricks in Word
Source: https://office-watch.com/2022/five-ways-to-add-vertical-lines-in-word/
Posted by: greenwoodablat1998.blogspot.com
0 Response to "How To Remove Red Vertical Line In Word"
Post a Comment